No products in the cart.

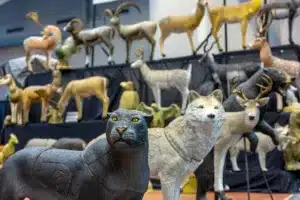
365 Archery 3D Archery Targets
When folks enter a new industry, or even a new subsection of their industry, they usually dip their toe in by offering one or two


One of the most difficult parts of self-filming for me is doing interviews and not sounding like a total goofball. Most people who know me would tell you I don’t have any problem with talking, in fact several of them have told me I talk too much. When it comes time to do an interview for a hunt, I ramble on and on until I realize my interview has gone on far too long, and I stop recording, only to start all over. Every once in a while, I get it right on my first try, but that is a rare occurrence. The biggest problem I find is that I try to say too much, or I pick a bad time to do an interview, and I’m constantly getting interrupted with opportunities to capture b-roll or film something meaningful for the hunt. So, what should you be saying, and when should you be saying it?
There are three types of interviews you should conduct when you are hunting. Pre-hunt, mid-hunt, and post-hunt. Each of these serves a different purpose, and each help to build the story you are trying to tell. In my opinion, the pre-hunt interview is the most important. The pre-hunt interview should take place when you first get in your treestand or blind. During this time, you should tell your viewers a little bit about your setup, the date, weather conditions, what you are expecting. The pre-hunt interview is where you set the stage for the rest of the hunt to unfold. Be yourself here, don’t try to imitate your favorite hunting celebrities. Just let the world know what you are thinking and help them see the woods from your perspective. I like to say who I am, where I’m hunting, and provide a little detail on my specific hunting setup. I typically try to keep these interviews to less than a minute. If you find that you are going on too long, remember, you can always edit the interview in post to shorten it, but you can’t go back and add detail. One thing to remember is to keep your voice down when doing these interview. You need to speak loud enough for your camera to pickup good audio, but you don’t want to be too loud and spook off everything within earshot. If your camera has audio levels, use them!
The mid-hunt interview is good to provide details on the video you have captured during your hunt, and possibly to explain things you missed on camera. Perhaps you had a buck chase a doe past your stand but you were unable to get it on film. The mid-hunt interview serves as a good opportunity to get your face in front of your audience, and explain what just happened. These types of updates are critical when helping your audience fully understand what’s going on during your hunt. Notice I said updates – plural. Don’t be afraid to do several mid-hunt interviews. At times this isn’t necessary, but other times, you might need more than a couple to fully explain your hunt.
Last but not least is the post-hunt interview. Hopefully this is the time you are telling everyone about your success in the field. Be sure to fill in your viewers on how your hunt transpired. Did you see much movement? Was the weather as you expected? Touch on the highlights of the hunt so you can overlay some B-roll footage to help tell your story when you get to editing the video. You don’t have to retell the entire story since you (hopefully) got it all on film. When I don’t have a successful hunt, I like to use my post-hunt interviews as an opportunity to setup the next morning or next weekend hunt. In a situation where you are getting a lot of game on film, it is sometimes nice to chain multiple days of hunting together into one video.
These interviews can be awkward, and at times intimidating. Just remember to have fun with them. This is also a great time to let your kids goof around if you are hunting with youngsters, and it is a good chance for you to practice being in front of the camera. You don’t have to get these right the first try. The more you do them, the better you’ll get at making your point with fewer words and with less retakes/outtakes.
If you have any questions or would like further clarification on the information from this article, please visit our contact form and let us know. We love hearing from our readers, and as always, we welcome any feedback or tips you have to offer.
SELFILMED 101 Series:

When folks enter a new industry, or even a new subsection of their industry, they usually dip their toe in by offering one or two

Highlights of Greylight’s new releases for 2024 – the Daybreak Blind, Transformer Tower, and Nomad trailer.

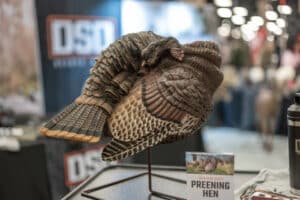
With one of their coolest decoys to date, the NWTF floor was buzzing with talk of the new DSD Preening Hen decoy. It’s almost TOO
Don’t miss a thing! Subscribe below to keep informed on everything that’s happening with the folks at SELFILMED.com
One Response