No products in the cart.

365 Archery 3D Archery Targets
When folks enter a new industry, or even a new subsection of their industry, they usually dip their toe in by offering one or two


It’s almost time for deer season, so you’ve been shooting your bow every chance you get… right? You are probably tired of laying your high-priced bow on the ground when you retrieve your arrows. Perhaps you dislike leaning over to pick up your next arrow after every shot. Or maybe you are just bored (like me) and decide you want to be MacGyver with some leftover junk in your garage. Regardless, if you are looking for a way to protect your bow, your back, and your arrows, building your own bow stand is a lot easier than you may think. Here’s a cheap and easy way to build your own bow shooting stand.
In order to keep costs low, I elected to use some old pipe and fittings I had laying around the house. While you could potentially do with other sizes, I used primarily 1-1/2″ SCHD40 PVC with good results. Here’s what I used:
Cut a 48″ section of 1-1/2″ pipe. This will be the vertical portion of the stand. Now cut six, 8″ sections of the remaining pipe. These will form the base of the stand. Next cut the remaining 1-1/2″ PVC pipe evenly down the center (leaving roughly four to six inches for each). The actual length of these pieces is not critical, as they simply form the arrow holders later on.
Cut the 3/4″ pipe in half, leaving each piece approximately six inches long. The actual length of these pieces are not critical, provided they are at least 1-1/2″ wider than your bow limbs.
Most of this next step is up to personal preference. I chose not to glue the majority of my stand so that I could disassemble when not in use to save space. However, at a minimum you must glue the three Tees in the base together for the stand to work. The rest of the items can be press-fit or glued to make it as permanent as you would like.
The foam on the 3/4″ pipe is an added touch that may not be necessary. However, if you baby your bow around the house like I do you’ll like the added protection and extra hold it gives when shooting from unlevel ground.
Want some extra credit? Swap the Tee on top for a 4-way Tee and attach a 1-1/2″ to 3″ reducer coupling with some of your excess 1-1/2″ pipe. It holds a typical “beverage” can quite nicely. Modify as necessary to make your bow shooting stand your way! If you have any questions, feel free to submit a question on our online contact form (HERE).

When folks enter a new industry, or even a new subsection of their industry, they usually dip their toe in by offering one or two

Highlights of Greylight’s new releases for 2024 – the Daybreak Blind, Transformer Tower, and Nomad trailer.

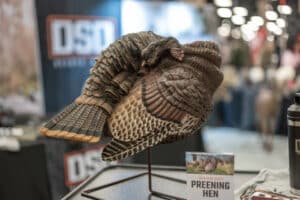
With one of their coolest decoys to date, the NWTF floor was buzzing with talk of the new DSD Preening Hen decoy. It’s almost TOO
Don’t miss a thing! Subscribe below to keep informed on everything that’s happening with the folks at SELFILMED.com
One Response
These stands are perfect for the back yard! Thanks for posting the plans!