No products in the cart.

365 Archery 3D Archery Targets
When folks enter a new industry, or even a new subsection of their industry, they usually dip their toe in by offering one or two

Blog / Product Reviews / Installation of Motion Madness DIY Peck and Sweep Kit in DSD Feeding Hen Decoy

I’m sure it has happened to you a time or two before. You are walking down the aisle at your favorite store and something just happens to catch your eye. That is exactly what happened to me as I walked down the aisles of the NWTF Convention in Nashville last spring. There are turkey decoys galore at the show, but this one was special. As it sat there on the display booth, sweeping to the side, pecking, coming back upright and sweeping the other direction and then pecking again. I sat there watching for a couple of seconds before finally going up to the Motion Madness Decoys booth and introducing myself to the owner, Randy Gunn.

What sat on that display booth was a whole lineup of decoys, turkeys, mallards, geese. What I was most interested in was the one sitting front and center. A Dave Smith Decoys Feeding Hen, and I knew I had to have one. After already having the most realistic turkey decoy on the market, the DSDs, only one thing was missing and that was a realistic motion system. As soon as the new Motion Madness DIY assembly kits were available, I jumped on the opportunity to get one. This article isn’t meant to be a review on the Motion Madness DIY assembly kit, but it is meant to show you the steps on how to install one in your own DSD Feeding Hen decoy. Follow along and if you have questions, feel free to shoot me a message and I’ll be glad to help.
First things first, stop by the Motion Madness Decoys website and purchase the DIY assembly kit you need. For the DSD Feeding Hen, you will need to purchase the Peck and Sweep Feeder DIY Assembly, Turkey Hen. The kit retails for $77.99 and can be purchased directly here: Peck and Sweep Feeder DIY Assembly
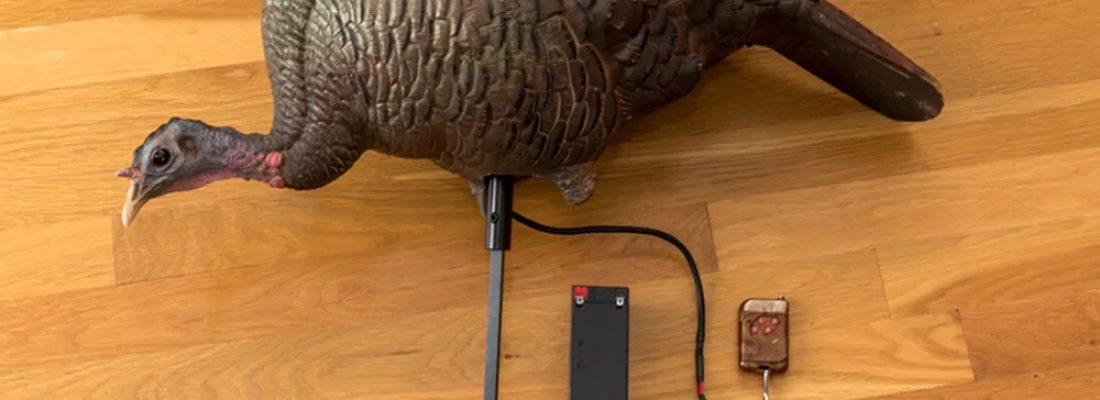
After receiving your kit, lay it all out to make sure that all parts are there. You should have Motion Madness assembly, remote receiver (attached to the assembly), a small remote control, and a 14″ chisel point stake. To complete the kit, you will need a DSD Feeding Hen and also purchase a small 12V SLA type battery and battery charger. I purchased my 1.3Ah (ampere-hour) battery and charger here: AJC 12V 1.3Ah SLA Battery. This battery should last over 12 hours of continued use before needing to be recharged.
Now that you have all of the parts required to assemble your motion decoy, you’ll need to gather a few tools to install the assembly into your DSD Feeding Hen.
Required Tools:
– Sharp Knife (Benchmade North Fork Folder)
– Drill with 1/4″ drill bit
– 5/32″ Allen Wrench
– Tape Measure
– Permanent Marker
– Saw (not pictured)
Follow the steps below to install the Motion Madness Peck and Sweep Feeder DIY Assembly into your DSD Feeding Hen decoy.
Using a sharp knife, cut a hole in the bottom of the DSD decoy. Usually with other hollow body decoys you would need to find the balance point of the decoy and mark approximately where the stake would come out of the bottom to make sure your assembly was situated perfectly in the decoy. With the DSD decoys, there is already a small PVC tube in the decoy which acts as a guide for the decoy stake. Use this PVC tube location and the legs as a guide as to where you should cut the hole. Size of the hole isn’t too important, just make sure it is large enough to fit the assembly inside. Remember, it is easier to cut more material off later than it is to put it back. After cutting the hole in the bottom of the decoy, you’ll need to reach inside and cut the PVC tube. Do not cut the PVC tube too close to the top of the decoys back or you may risk damaging your decoy. After the hole is cut and PVC tube has been partially removed, test fit the assembly.
Now flip the decoy over and locate the top center of the decoy. On most of the DSD decoys you can see a little deformed spot (see circled part in picture). This is where the PVC tube on the interior of the decoy meets up with the exterior body of the decoy. You’ll want to put a mark with your permanent marker 1-1/4″ on both sides of this spot in the directions of the wings. After you have marked the two spots, measure again between the two spots and confirm there is 2-1/2″ between the spots.
Next, take your drill with a 1/4″ drill bit and drill a hole through the two spots you marked in Step 2. Once again, confirm that you have exactly 2-1/2″ between your two mounting holes and then proceed to Step 4.
The Motion Madness Decoy assembly has two allen head cap screws with a total of four (4) washers (2 small and 2 large) on top of the arms. After removing the cap screws, set the larger washers aside for a second. Put the smaller washer on the cap screw and then push the cap screw into the top of the decoy through the 1/4″ holes you drilled in Step 3.
Now flip the decoy back over and place the large washers inside the decoy on the cap screws you installed on Step 4. Next slide the Motion Madness Decoy assembly into the decoy body, making sure the wiring harness/receiver is facing the front (head) of the decoy. Align the vertical arms with the screws in the top of the decoy and push the screw into the rubber grommet. After the screws are in place, tighten them with the 5/32″ allen wrench. Do not over-tighten!
The last thing to do is to remove the tape from the backside of the velcro on the receiver and place the receiver inside the decoy body. The spot in front of the Motion Madness Decoy assembly (between the head and the legs of the decoy) is flat and makes the perfect location to stick the receiver.
After you have finished Step 6, you are now ready to use your decoy. Start by placing the chisel tip stake into the ground to your desired height. Then align the hole of the Motion Madness Decoy assembly with the stake and slide the assembly down onto the stake. Finally, connect your decoy to your 12V SLA battery. The red plastic lead goes onto the positive (+) pin on the battery, and the blue colored lead goes onto the negative (-) pin on the battery. Using your remote control, turn the decoy on and you are ready to hunt!
If you have any questions with the assembly, you can contact Motion Madness Decoys direct at 636-600-1817 or send them an email at info@motionmadnessdecoys.com. You can also send us an email through our Contact Us page and we’ll be glad to help you out!
As always, check your state and local game laws before using this or any other electronically operated decoys.

When folks enter a new industry, or even a new subsection of their industry, they usually dip their toe in by offering one or two

Highlights of Greylight’s new releases for 2024 – the Daybreak Blind, Transformer Tower, and Nomad trailer.

With one of their coolest decoys to date, the NWTF floor was buzzing with talk of the new DSD Preening Hen decoy. It’s almost TOO
Don’t miss a thing! Subscribe below to keep informed on everything that’s happening with the folks at SELFILMED.com
2 Responses
Brett are you still making these motors if so I want some
Hi Thomas, thanks for reaching out. We (SELFILMED) did not make the motors. The article is only an installation of them. I don’t believe Motion Madness is in business anymore and has sold off their assets.