No products in the cart.

365 Archery 3D Archery Targets
When folks enter a new industry, or even a new subsection of their industry, they usually dip their toe in by offering one or two

Though being SELFILMED is never an “easy” task, there exist very few hunts that are easier to successfully film than a turkey hunt from a pop-up blind. With the use of super realistic turkey decoys and artful crafted calls you can pull birds into a close predetermined location. Capturing the shot on film once the gobbler arrives and all of the emotions of the hunt can be done with a properly placed camera array.

Setup is extremely important in the success of the hunt, and equally so for the quality of your video. Using multiple cameras from a stationary location like a pop-up blind or natural ground blind is the most effective way to capture the bird’s approach, yourself preparing for the shot, and capturing the impact of the shot on film.
As I have written before using multiple cameras in various angles takes pressure off of your primary camera as the sole device to capture the moment. This year the SELFILMED team will be using many different makes and models of primary cameras.

Beside me will be a Canon 5D with a Rode VideoMic. I will be using a Sigma f4-5.6 135mm-400mm as the primary action lens and a Sigma f2.8 24-70mm lenses for interviews and b-roll shots. Both Brett Bueltel and Brad Blackwelder will rely on Canon XA10’s with either Sennheiser or Azden wireless microphone setups and both use Rode NTG-1 shotgun mics. When not hunting in tandem with me, Sarah will capture her hunt on a Canon HF S10 with a Rode VideoMic. Everyone runs either 503 or 701 Bogen Manfrotto tripod heads mounted on various Manfrotto tripods.

All of these camera setups are more than capable of capturing phenomenal footage for hunting action or scenic b-roll scenes. Now that you have an idea of possible primary camera options now let’s learn proper camera placement for ease of use while in the blind. Your primary camera should be setup on your right hand side as close as comfortable to you in your blind setup.

The reason for this is nearly every make and model of video camera or DSLR camera has a LCD viewing screen that flips out toward the left or is located on the rear of the camera. Being able to see the LCD viewing screen on your primary camera is essential in framing and focusing your subject correctly. As you can imagine, this can prove to be difficult for left-handed hunters such as SELFILMED team member Brad Blackwelder. One option to battle this issue is to use an external monitor and position the camera on your left hand side if you are a switch hitter.
Your primary camera will capture your main audio and hopefully your shot, while proper placed secondary cameras will increase the likelihood of getting the arrow impact. The use of point of view (POV) cameras has been extremely important in creating a system of fail-safe camera angles to capture all the live footage needed to edit top grade SELFILMED hunts. You will never see reenacted scenes on selfilmed.com because all the footage we use as “action b-roll” was filmed live on a secondary camera.

Placing a GoPro camera on a Clip-Shot and fastening it to a blind rod is a great way to capture the intensity of the pre-shot, shot, and post shot events in real-time. As the bird approaches, just lean forward and power-on the camera, hit record, then forget about it and concentrate on drawing that bird into your effective range. If it takes 30 minutes for you to get your shot opportunity then when that moment comes you wont be fiddling with a camera to capture your draw and shot. Another option is to use a smaller video camera or DSLR on a gorilla pod or small tripod placed on the ground in the corner of the blind to capture the same angle.

Placing your decoys within 10-12 yards of your blind will pull the birds in close and give you the added benefit in knowing where the birds are likely to end up for the shot. However, keep in mind that closer is not always better. Setting your decoys up closer than 8 yards may result in the bird coming in too close. If you have never shot your bow or shotgun at 4 yards, I’d highly recommend you do so to see where your impact points are. For archery, close range shots will have a significantly different point of impact than a shot at 10-12 yards using the same pin.

Place the decoys in the open where good pre-roll of the bird approaching can be captured but more importantly where you can get a good unobstructed shot opportunity. Placing a secondary camera in the decoy spread can make for some very close and personal footage of the birds as they interact with the decoys.
By placing a camera behind the decoy spread and pointed back at the blind, it is quite possible you will capture the arrow exit from the bird. Personally, I use GoPro cameras for this angle as they are compact and inconspicuous to birds as they approach.

In the past I have also used smaller HD cameras such as a Canon HF S10 or HV40 to pull off the same angle. With the use of a GoPro Wi-Fi BacPac and remote or the GoPro Black Editon you can press record from a distance to conserve battery life and/or memory card space.
Before the addition of the Wi-Fi system, we used an additional battery and 32 GB SD cards in the GoPro to give us several hours of constant record time without any maintenance. This is truly a set it and forget it camera system. Place it behind the decoys facing back on a gorilla pod and hit record before you get in the blind for the hunt. This way as the birds approach you only have to worry about powering on the secondary blind camera and your primary camera. Keep in mind if you are using the Wi-Fi system you can power on your decoy camera and secondary blind camera simultaneously with the same GoPro remote once it is programmed.
Properly setting up your blind and decoys while using this 3 camera array will take some pressure off of you running the primary camera. It will capture the real-time events and portray them the way they actually happened with no fake reenactments. With all this action footage you have the opportunity to edit some truly incredible hunts. So be creative and take some time to play around with various camera angles to see which ones you like best. Most of all, have fun being SELFILMED!

When folks enter a new industry, or even a new subsection of their industry, they usually dip their toe in by offering one or two

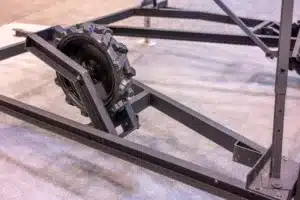
Highlights of Greylight’s new releases for 2024 – the Daybreak Blind, Transformer Tower, and Nomad trailer.

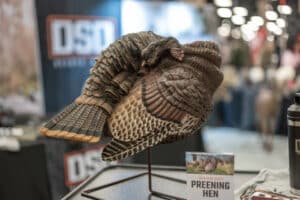
With one of their coolest decoys to date, the NWTF floor was buzzing with talk of the new DSD Preening Hen decoy. It’s almost TOO
Don’t miss a thing! Subscribe below to keep informed on everything that’s happening with the folks at SELFILMED.com