No products in the cart.

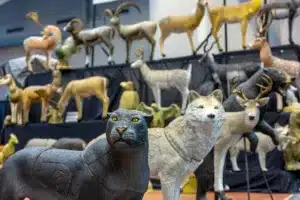
365 Archery 3D Archery Targets
When folks enter a new industry, or even a new subsection of their industry, they usually dip their toe in by offering one or two


So you finally had a successful hunt, you got the shot on camera, and your second and third angle footage is perfect. The hunt couldn’t have gone any better. After a long evening of getting your animal taken care of you suddenly realize your mistake. Amidst all of the excitement you completely forgot to film a post hunt interview! You wonder if the footage you have will be sufficient, but you know deep down you could have done a better job. We’ve all been there, and it is definitely a frustrating feeling. With a little preparation, these frustrations can be easily avoided.
Just like all of the b-roll you’ll want to capture during your hunt, there are a few critical pieces of footage you should try to get post hunt. There is definitely an endless array of shots you could get, but this article will focus on the following: post-shot interview, recovery footage, post-hunt interview and gear loading/exit.
The post-shot interview should be kept brief and shot immediately after the kill shot. This is when the adrenaline and excitement of the hunt truly shows. It should be a short clip, but it is an important part of telling your story. Often times, you spend hours and hours waiting for an opportunity at an animal and once it happens, it happens quick. As a viewer, it is hard to fully understand exactly what happened many times, so it is a good idea to provide a quick recap of the shot opportunity and how it came into being. There is no need to elaborate in too great of detail at this point, that can be saved for your post-hunt interview. However, it is often times a good idea to share your initial thoughts on your shot placement and your expected outcome of the hunt.
Next, you’ll obviously be on the recovery. One good shot to get at the start of this period is climbing down out of your stand. At the least, get some footage of lowering your bow/packing up your backpack. Once you hit the ground, it is good to shoot some footage of the blood trailing process, get footage of any sign that you come across, etc. If you see your animal drop within sight, it is still good to get some footage of recovering your arrow or finding the first blood. This process provides a great opportunity to share an “updated opinion” on your shot placement and likelihood of recovering the animal. Again, this footage does not have to make up a huge portion of your hunt, but always shoot more than you think you’ll need. It’s best to have options when you hit the editing station.
At this point, you’ve hopefully found your animal, and you are likely pumped…be sure to show it! Take the time to do a post-hunt interview with your kill. Walk back through the hunt, share any pertinent details on preparation that helped you be successful. Remember, filming your hunts is really just a great way to share your story and also relive it. So be sure to share as much detail as you can, for example: why you placed your treestand where you did. This detail is what helps make a good hunt great. It’s always best to film more than you think you’ll use here. In reality, when you go to edit your hunt, you’ll edit out most of this interview since the viewer will have already watched it unfold, but there are always going to be moments of the hunt that you weren’t able to capture on film.
Last but not least, shoot some additional b-roll transporting your animal from the field and loading it, as well as your gear, into your truck. This footage helps to create a natural ending to your hunt so it doesn’t go straight from your post-hunt interview to a black screen. This type of footage is very easy to capture, but it is often overlooked.We are guilty of skipping this step as well, but have been working hard over the past couple years to do a better job wrapping up the story. To capture some exit footage, simply place your camera on the ground in different locations as you are walking or loading your gear, and even as you drive away. Just don’t forget to go back and retrieve your camera!
Like all things that are self-filmed, these tasks can be tedious and tiring, especially considering you’ll already be exhausted from all the effort you’ve put into your hunt. However, I promise you, the extra effort will be worth it in the end. You’ll be glad you took the extra steps after the shot to capture the hunt in its entirety.
I’d be remiss if I didn’t mention this, even though it doesn’t have anything to do filming, but make sure you take some time to get some great photos! Check back soon as we’ll be putting together a similar mini 101 series on photography, specifically with regards to hunting related photos and hero shots.
If you have any questions or would like further clarification on the information from this article, please visit our contact form and let us know. We love hearing from our readers, and as always, we welcome any feedback or tips you have to offer.
SELFILMED 101 Series:

When folks enter a new industry, or even a new subsection of their industry, they usually dip their toe in by offering one or two

Highlights of Greylight’s new releases for 2024 – the Daybreak Blind, Transformer Tower, and Nomad trailer.

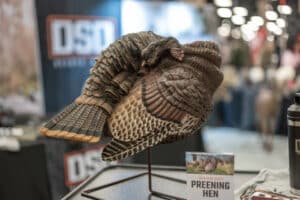
With one of their coolest decoys to date, the NWTF floor was buzzing with talk of the new DSD Preening Hen decoy. It’s almost TOO
Don’t miss a thing! Subscribe below to keep informed on everything that’s happening with the folks at SELFILMED.com
3 Responses