No products in the cart.
365 Archery 3D Archery Targets
When folks enter a new industry, or even a new subsection of their industry, they usually dip their toe in by offering one or two


When illustrating the hunt of a lifetime, it is often stated that a picture is worth a thousand words. How much is a video clip worth? When you are self-filming, it is important to remember that you’re trying to tell a story – not simply showcasing a kill-shot. The general rule-of-thumb is if you’re going to talk about it during the video, you should try to have a cutaway to support it. B-roll can make a video great and put your video above other self-filmed videos and if done correctly, on par with dedicated cameraman hunts. Lack of B-roll can do the opposite.
One of the most often overlooked video opportunities is the pre-hunt preparation that each of us go through. This pre-hunt preparation footage is good footage to not only build up interest going into the hunt, but also serve as a good lead-in to begin the video and set the stage for the viewer. Here’s a quick down and dirty list of pre-hunt shots to shoot on your next hunt:
One of the most-used (and arguably the most important) clips are scenic shots that describe your surroundings. I’ll often grab most of my area shots post-shot, when I have an idea of what I’ll be describing in the video. However, prominent features are always a quick and easy item to grab during the hunt. Again, if you mention it in your hunt interview, its a good idea to try to get supporting shots for it. Here’s a quick list of area/scenic shots to capture in your next hunt:

It is very important that you gather the above mentioned areas shots on the day of your hunt. The “look” of your video due to available lighting, cloud cover, weather, etc. need to match that of the actual hunting conditions. Not too often is the weather, cloud cover, etc. the same from one day to the next. Speaking of weather…cut-away shots of the current weather conditions are also great shots to capture. These shots help put the viewer in your shoes and better set the stage for the hunt. Here’s a quick list of weather shots to capture:
 Hopefully you have read Part 6 on the importance of second and third angles (If not, click HERE). These shots also can help bridge the time from the start of the hunt after you’ve already recorded your pre-hunt interview, to the eagerly awaited shot opportunity. While these second and third angle shots can be recreated after the fact, we strongly recommend continuously recording 2nd and 3rd angle shots to help capture the true emotions of the hunt. The excitement on your face after connecting on a monster whitetail is very hard to re-create after the fact, and the viewer will appreciate seeing the raw emotions instead of a staged reenactment.
With a 3rd person view setup, I’ll often capture B-roll cutaways of things like glassing in the distance, ranging the animal, or getting your shot in focus. You can also use this approach for pre or post-hunt items like setting up decoys, climbing your stand, walking up to your arrow or animal, or drawing your bow. The possibilities really are only limited by your imagination.
Aside from the harvest footage, the most exciting footage for most is seeing the reaction of the hunter. Typically, the last thing on my mind after a shot is turning my main camera back towards myself. However, unless you have a dedicated camera pointed at you (insert pic) then you’ll miss the footage that is going to draw people to keep watching.
Keep in mind that all of the shots mentioned in this article can be captured multiple ways. Use motion (slider or pan), rack focus, shoot wide angle, shoot tight, etc. to add cinematic elements to the shots. Be creative!
Lastly, do yourself a favor and video an interview post-hunt (the more angles the better). More on that coming up in Part 9…
SELFILMED 101 Series:
When folks enter a new industry, or even a new subsection of their industry, they usually dip their toe in by offering one or two
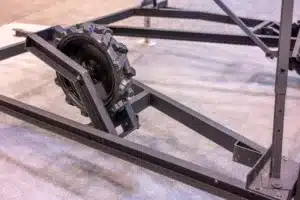
Highlights of Greylight’s new releases for 2024 – the Daybreak Blind, Transformer Tower, and Nomad trailer.
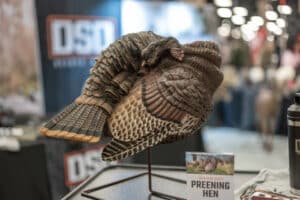
With one of their coolest decoys to date, the NWTF floor was buzzing with talk of the new DSD Preening Hen decoy. It’s almost TOO
One Response