No products in the cart.
365 Archery 3D Archery Targets
When folks enter a new industry, or even a new subsection of their industry, they usually dip their toe in by offering one or two

Laying east of the Rocky Mountains and west of the corn belt you will find vast open lands home to a diversity of wildlife living in the rolling grasslands, open river bottoms, deep canyons, and scattered crop fields. Deer, elk, and antelope thrive in this environment as well as a number of game birds and predators. From a hilltop you can see miles upon miles in all directions, which is your greatest asset as well as liability, when it comes to spotting and stalking a mature animal.

PREPARING FOR YOUR MIDWESTERN HUNT:
In this wide open terrain, shot opportunities can be had from 20 to over 1,000 yards. Practice at longer distances with whatever weapon you are using. Try to shoot every day if you can, especially archery hunters. Practice like you will be hunting. I’ll put everything on that I will be wearing while hunting, including my backpack, and shoot a few arrows. That way if anything will be interfering with the shot, I can fix it in my yard and not in the field. I also like to practice shooting in different positions that may simulate what may happen in the field.

For you archery hunters, practice holding at full draw for a while, then shooting. Last year I had to hold my draw while trying to get a buck to stand up. I hadn’t practiced it a whole lot so when he finally stood up, my shot was rushed and the placement was not like I’d hoped for. I also shoot my target at downward and upward angles.
Purchase a rangefinder. It’s very tough to judge exact distances in this open rolling terrain, and 10 yards could be the difference between a good shot and a total miss. I use the Leupold 1,000 with true ballistic range (TBR). TBR compensates for the shot angle and calculates what distance you need to shoot for versus what the actual distance is. For example, if I was shooting at an elk 400 yards away up the hill. Although it may calculate that my actual distance is 400 yards, with the 40 degree angle I need to aim like he is only 335 yards away. I can’t think of a more than necessary tool for hunting anywhere with any weapon.
Also consider physical fitness when planning your trip. Although this isn’t mountainous terrain it can still get very rough. Keep in mind that your goal is to harvest a mature animal that has lived on these lands all their lives and have an incredible advantage over you. Getting in shape will put more odds in your favor, and will give you the endurance needed to pursue these animals all day.
GLASS, GLASS, GLASS:

Besides covering ground, glassing will be your largest priority in such open country. A good vantage point will allow you to glass in many directions so you can observe the animals for a long period of time without disturbing their natural behaviors. From their feeding areas to bedding areas are best. When picking a vantage point make sure you can come in and out without disturbance and also make sure you are set up below the skyline to keep yourself hidden. Try and set up with the sun at your back to prevent sun glare through your optics.
While beginning to glass, start out with binoculars or the lowest power on a spotting scope, as to have a wider field of view allowing more ground to be covered. Use a systematic approach to covering this much country by glassing in a grid or linear pattern. After running over the area a few times with low power optics, zoom into the area and “pick it apart” with your higher power optics. Your not necessarily looking for the whole animal but rather parts of animals and movement. You may catch the flick of a tail or tips of antlers moving behind some brush.

A tripod is a great thing in a long glassing session, not only does it keep the picture steady and clear it helps keep stress off of your eyes while glassing for long periods of time. If you don’t have a tripod you can put your elbows on your knees for added stability as well as holding the brim of your cap while using binoculars. Keeping comfortable will tremendously help in keeping your eyes from getting tired during extended glassing sessions and will help you stay patient in running over a piece of ground. Glassing too quickly can lead to missing a big buck in the shadows.
When choosing your optics for an open country type hunt, keep in mind that you will be spending a lot of time behind these optics and will want to look through good quality glass. While looking at binoculars and spotting scopes there will be a series of numbers to go along with each. For example with binoculars it may be 10 x 42, 10 being the magnification power and 42 refers to the diameter of the objective lens.

On a spotting scope you may see 20-60×80, with 20 being lowest power and 60 being the highest, with 80 the diameter of the objective lens. In simplest terms this means the larger the objective lens, more light can be gathered which makes them more effective in low light situations, a time when the animals are on their feet. My advice is buy the best you can afford. When comparing optics, test them side by side and see the difference. Pick out a sign with bold block letters that will be easy to decipher a crisp focused picture and a slightly blurry non focused picture. Good optics should be clear and crisp consistently throughout the full diameter of the glass. Try to avoid glass with blurriness around the edges as it causes a fish-eye effect. Leupold provides a wide range of optics to accompany any hunter in search of quality glass at affordable prices. One ongoing debate for binoculars and spotting scopes is, “which one do I choose?”. I say choose both. For my binoculars I like having the 10 x 42’s strapped on me for quick access and making the initial scan over an area I want to glass thoroughly. I like a spotting scope for the up close looks and picking apart an area. Another option is going with a high power pair of binoculars to get both the compact features of a binocular and the power from a spotting scope. However, I feel with this method you will be zoomed in too close half the time and the other half not zoomed in enough.

As you’re looking in areas animals are likely to be, focus on their feeding area to start with. This is where they are most likely to be hanging out in the evening to morning hours. Open meadows where the grass is green or crop fields are great places to start. Locating their feeding grounds will set the stage for finding entrance and exit points they like to use, the bedding areas and hopefully the stalk. All this starts with a good vantage point and taking advantage of good optics. If you can watch the big buck you want to harvest from his breakfast to his bed, you have successfully set the stage to begin planning a stalk.
Don’t miss Part 2, featuring stalking tactics and a few real life scenarios!
Stay up to date with our blog by subscribing via e-mail, in the top right hand corner of this page. Then, head over to our Facebook page at facebook.com/SELFILMED and give us a like for the latest updates, pictures, videos, and giveaways!
To purchase or learn more about the optics mentioned in this post go to www.leupold.com for their line of high quality binoculars, spotting scopes, and rangefinders.
When folks enter a new industry, or even a new subsection of their industry, they usually dip their toe in by offering one or two
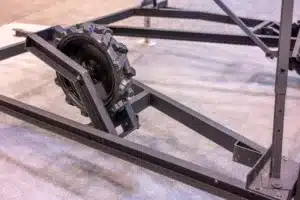
Highlights of Greylight’s new releases for 2024 – the Daybreak Blind, Transformer Tower, and Nomad trailer.
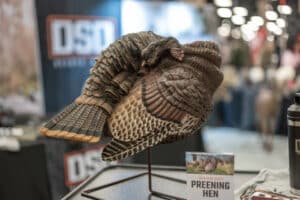
With one of their coolest decoys to date, the NWTF floor was buzzing with talk of the new DSD Preening Hen decoy. It’s almost TOO